Overview
PolyFX is a 3ds Max plugin designed to give artists full control over fragment-based animations. It allows you to break objects into pieces and animate them with precision, offering a range of modes, tools, and fine-tuning options. Ideal for motion graphics, game development, and other production workflows.
Requirements & Installation
Requirements
3ds Max 2016 - 2027
Installation
- Unzip the archive
PolyFX.zip. - Run 3ds Max
as administrator. - Drag the
PolyFX.mzpfile into the viewport. If drag-and-drop is not available, useScripting > Run Script. - Click
Install. - Restart 3ds Max to complete the installation.
- Launch via
Command Panel > Create > Geometry, selectPolyFXfrom the dropdown, clickPolyFX, then click in the viewport.
Alternatively, access it from the macro list viaCustomize > Customize User Interface > Group: Main UI > Category: BodyulCG, where you can assign it to a hotkey or add it to a toolbar.
Quick Start
This walkthrough gets you to a working animation in Key mode — the default mode — as quickly as possible.

- Open PolyFX via the Command Panel Create > Geometry > PolyFX, then click anywhere in the viewport.
- Click Pick Object and select the mesh you want to animate in the viewport. The button border turns blue when a valid object is picked.
- Set Start Frame, Speed, and Falloff in the Time / Create Anim. section to define the timing.
- Click Create Animation. PolyFX detaches the mesh into fragments and generates keyframes for each one. The blue progress bar shows how far along the process is. Press Esc to cancel.
- Scrub the timeline — the fragments animate from a scattered state into the assembled object. If you want the opposite direction (object flies apart), enable Invert.
- Adjust any parameter and click Create Animation again. The previous result is cleared automatically before the new one is generated.
Interface Overview
The PolyFX window is resizable. It has a standard menu bar at the top. Inside, there is a single rollout, and its title shows the current working mode.

Object / Helper

This section handles the two main inputs: the object to animate, and the optional helper that controls animation direction.
Pick Object
Click this button, then click any geometry object in the viewport to assign it as the source. The button border turns blue when a valid object is assigned, and red when nothing is picked or the node is no longer valid. Once picked, the button label changes to the object's name.
Use
Determines what PolyFX treats as a single animated fragment.
- Polygons Detaches every individual face as a separate piece.
- Elements Detaches each disconnected mesh element as one piece — useful when the object was pre-fragmented with Quick Detach or Pattern Fragmentation and already contains logical groups.
Direct. from Helper
Available in Key mode only. When enabled, activates the Pick Point button. Pick a Point helper from the scene — the fragments will be sorted by their distance from the helper, so the animation propagates outward from that location. The helper position also sets the pivot direction for all fragments when Center by Object/Helper is selected in Setup.
![PolyFX Direct. from Helper [Disabled]](/assets/docs/polyfx/helper-disabled.gif)
![PolyFX Direct. from Helper [Enabled]](/assets/docs/polyfx/helper-enabled.gif)
Pick Point / Pick Gizmo
In Key mode, used to pick a Point helper for animation direction (see above). In Controller and Particle modes, this button becomes Pick Gizmo — pick a SphereGizmo object. The sphere's radius defines the zone of influence: fragments inside the sphere are animated by the current parameters, fragments outside sit at their maximum transformed state.
Setup

Controls how fragments are centered and organized after detaching.
Type
Sets the pivot point strategy for each fragment.
- Center by Object/Helper: All fragments share a single pivot at the center of the original object, or at the Point helper position if Direct. from Helper is enabled.
- Center by Poly/Element: Each fragment gets its own pivot at its local center. The second option is required in Controller and Particle modes.
Show in Realtime
Key mode only. While animation keys are being generated, the timeline slider advances to the current fragment so you can watch the animation build up in real time. This slows down generation but gives you an immediate visual preview of the result.
Anim. Visibility
Key mode only. When enabled, fragment visibility is also keyframed alongside position, rotation, and scale. Fragments fade out (or in) at the end of their animation range, preventing them from lingering after the motion is complete.
Add to Group
When enabled, all generated fragment objects are automatically placed in a 3ds Max group. The group name is taken from the G.Name field.
G.Name
Name of the group created when Add to Group is enabled. Default: Group_FX.
Name
Base name for each generated fragment object. Fragments are named sequentially — for example, Poly_FX1, Poly_FX2, and so on. Default: Poly_FX.
Sets the wireframe color of fragments based on their animation order. Default uses the color defined in the Other section. The gradient options (Red>Green, Red>Blue, etc.) color each fragment along a ramp according to its sequence position, making it easy to visualize the animation order in the viewport.

Time / Create Anim.

Timing controls and the main action buttons. The exact contents of this section change depending on the active mode.
Start Frame
Key mode only. The timeline frame at which the first fragment begins animating. All subsequent fragments start after this frame, spaced out by their order and the Speed value.
Speed
Key mode only. Controls the delay between successive fragments. Higher values compress the timing so more fragments animate per frame. Lower values spread them out over more frames. Default: 1.0.
Auto Time Range
Key mode only. When enabled, automatically extends the scene's animation range to fit the total duration of the generated animation. Saves a manual adjustment step when prototyping.
Create Animation
The main action button in Key mode. Clears any previous result, detaches the source mesh into fragment objects, and generates keyframes for position, rotation, and scale on each one. The blue progress bar below the button shows progress. Press Esc to cancel mid-generation. In Controller mode this button is labeled Set Control; in Particle mode it is labeled Set PFlow.
Clear
Deletes all generated fragment objects from the scene. Right-clicking the button deletes the original (hidden) source object instead.
U / H Orig.
Unhides the original source object. Right-clicking hides it again. Useful when you need to reference or edit the source mesh after fragments have been generated.
Reverse (Start>End)
Key mode only. Reverses the order in which fragments animate — the last fragment in the sequence animates first, and the first animates last. Can be toggled after animation is generated; keys are recalculated automatically.
Invert
Key mode only. Flips the animation direction. When off, fragments start scattered and assemble into the object. When on, they start assembled and fly apart. Like Reverse, this can be toggled after generation without re-running Create Animation.
Set Control
Controller mode only. Assigns a Script Controller to each fragment's position, rotation, and scale tracks. After pressing this, moving the SphereGizmo in the viewport drives the animation interactively in real time.
Set PFlow
Particle mode only. Creates a Particle Flow system that uses the fragment meshes as particle shapes. The fragments are hidden and their transforms are evaluated by the PFlow operator script each frame.
Control

Visible in Controller mode only. Three checkboxes control which events trigger a viewport refresh of the Script Controllers.
Move Gizmo
Updates when the SphereGizmo is moved.
Spinner Control
Updates when any value in the Transform section is changed.
Curve Control
Updates when the curve editor is edited.
PF Source

Visible in Particle mode only.
P. Type
Sets the display type of the Particle Flow system in the viewport: Geometry, Dots, Ticks, Lines, Bounding Boxes, and so on. None (OFF) disables particle rendering entirely.
Quantity %
Controls what percentage of the total fragment count is included in the Particle Flow output. At 100% all fragments are rendered as particles; lower values display only a subset. Useful for reducing viewport load during setup.
Shell / Normal

Modifier shortcuts for adding thickness and correcting normals on flat fragments. When a mesh is broken into individual polygon faces, each piece is a flat, single-sided surface. These buttons apply modifiers to all fragments simultaneously.
mod. Shell
Adds a Shell modifier to all fragment objects, giving each piece physical thickness. The extrusion amount is set by In. Amount and Out. Amount.
In. Amount / Out. Amount
Inner and outer extrusion values for the Shell modifier. Changes update all fragments live after the modifier has been applied.
mod. Normal
Adds a Normal modifier to all fragment objects. Use this when fragment faces appear black or invisible due to normals being flipped inward after detaching.
Flip Normals
When enabled, the Normal modifier flips the normals on all faces. Enabled by default.
Delete
Removes the topmost modifier from all fragment objects. One Delete button is paired with Shell, the other with Normal.
Transform

These parameters define the movement, rotation, and scale applied to each fragment during animation. All values act as offsets from the fragment's rest position and are multiplied by the corresponding curve value over the animation progress.
Random Rot.
Adds a random rotation offset to each fragment. Every fragment receives a unique value, seeded by the Seed parameter below. Higher values produce more chaotic spinning during the animation.
Random Pos.
Adds a random positional offset to each fragment, displacing each piece in a different direction. Combined with the Position curve, this produces an organic scatter effect.
Normal Pos.
Moves each fragment along its own surface normal direction. Positive values push fragments outward from the object surface; negative values pull them inward. Produces a clean "explode outward" look that follows the shape of the mesh.


Seed
Changes the random number used for Random Rot. and Random Pos. Incrementing this value reshuffles the distribution across all fragments without affecting the overall amounts.
Position X / Y / Z
Adds a uniform directional offset to all fragments along each world axis. Use this to move the entire scattered state in a specific direction — for example, setting a positive Z value makes all fragments fly upward.
Rotate X / Y / Z
Adds a uniform rotation to all fragments around each world axis. Combined with Random Rot., this tilts the overall rotation distribution toward a particular direction.
Scale %
Overall scale multiplier applied to fragments in their animated state. At 100%, scale is driven purely by the Scale curve shape. The read-only field next to it shows the inverse value — how much each fragment shrinks relative to its full size.
Other

Color (Objects)
Sets the wireframe color assigned to all fragment objects. This is the color used when Color poly by Progress is set to Default. Click the swatch to open the color picker.
Material
Drag a material from the Material Editor onto this button to apply it to all fragment objects at once. In Particle mode, the material is also assigned to the PFlow material operator. The Clear button next to it removes the assigned material from all fragments.
Select Objects
Selects all current fragment objects in the scene. Useful for applying modifiers, materials, or other operations from outside the PolyFX interface.
Falloff / Curve Control

The curve editor contains three independent curves — Scale, Rotation, and Position — each of which multiplies the corresponding transform values across the normalized animation progress from 0 to 1. The horizontal axis represents animation progress (0 = scattered start, 1 = assembled end); the vertical axis is the multiplier applied to the transform.
Key mode only. The number of frames over which each individual fragment transitions from its scattered state to its rest position. A Falloff of 10 means each fragment takes 10 frames to complete its motion.

Curve step (1.0/N)
Key mode only. Controls how many keyframes are placed per fragment within the Falloff range. Higher values produce more keys and smoother curve playback at the cost of scene size. The label displays the step as a fraction — for example, 1.0/5 places one key for every fifth of the falloff duration.


Update
Manually recalculates all animation keys using the current curve shapes. Use this after editing curves when Auto Update is turned off.
Auto Update
When enabled, keys are recalculated automatically every time a curve point is moved or a tangent is adjusted. Convenient for fast iteration, but can be slow with a large fragment count.
Curves (Scale / Rotation / Position)
The dropdown switches which curve is visible in the editor. Scale is displayed in red, Rotation in green, Position in blue. All three curves are always active regardless of which one is shown.
Right-click a curve point to delete it. Use the toolbar above the curve editor to switch between corner, smooth, and bezier tangent modes. The Reset button (toolbar) returns a curve to its flat default state.
Animation Modes
PolyFX has three animation modes. You can switch between them from the Mode item in the menu bar at the top of the interface.
Key Mode
Key mode generates standard keyframe animation. PolyFX writes position, rotation, and scale keys directly to each fragment object. The result is a completely standard 3ds Max animation — it plays back and renders without PolyFX installed, and the keys are visible and editable in the Track View like any other animation.
Every time you press Create Animation or change a parameter, all keys are recalculated and overwritten. Key mode is the only mode that supports the Layers feature.
Controller Mode
Controller mode assigns a Script Controller to each fragment's position, rotation, and scale tracks. The controllers evaluate each fragment's transform based on its distance from a SphereGizmo — fragments inside the sphere are driven by the current parameters; fragments outside sit at their maximum transformed state.
Because the calculation happens on every viewport update, the result is interactive: move the SphereGizmo in the viewport and all fragments respond in real time. Animate the SphereGizmo's position and radius on the timeline to create the assembly motion.
This mode does not produce keyframes on the fragments directly. To convert the result to standard keys for rendering, use Collapse Controllers from the Animation menu.
Requires a SphereGizmo picked via the Pick Gizmo button before pressing Set Control.
Particle Mode
Particle mode works similarly to Controller mode — the SphereGizmo drives fragment transforms based on distance — but the rendering is handled by a Particle Flow system instead of Script Controllers on real objects. The fragment objects are hidden, and a PFX_PF_Source Particle Flow setup is created that uses the fragment meshes as particle shapes.
This is considerably faster in the viewport than Controller mode with many fragments. It also enables the Transform by Map feature, which lets a texture map modulate which fragments are affected and by how much.
To convert Particle mode output to standard keyframe animation, use Collapse Controllers.
Requires a SphereGizmo picked via the Pick Gizmo button before pressing Set PFlow.
Transform by Map

Available in Particle mode only. Lets you use any texture map to modulate the scale, rotation, and position of individual fragments based on the map's brightness or color, sampled at each fragment's UV position on the original mesh.
Open this window from the Transform by Map button that appears in the main window when Particle mode is active.
Map
Drag any texture from the Material Editor to assign it. The map is rendered internally at the resolution set below and sampled once per fragment based on its UV coordinates.
Use Map
Enables or disables the map's influence. When unchecked, all fragments animate uniformly as if no map were assigned.
Resolution
The resolution at which the map is internally rendered for sampling. Higher values give more accurate per-fragment results at the cost of performance. Default: 200. A value of 100–200 is sufficient for most cases.
Scale / Rotation / Position
Three checkboxes enable the map's influence on each transform channel independently. Each has a paired Invert checkbox on the right — when enabled, bright areas of the map produce low influence and dark areas produce high influence.
When enabled, the RGB channels of the map are mapped to the three rotation axes: Red > X, Green > Y, Blue > Z. When disabled, only the luminance (brightness) value is used for all axes.

Layers

Layers allow you to work with multiple objects in the same PolyFX session without losing the settings for each one. Each layer stores a separate object along with its own animation parameters, Transform values, and Curve Control shapes. Only one layer is active at a time.
Open the Layers window from Animation > Layers in the title bar menu. Layers are only available in Key mode.
Name
Type a name for the new layer here before adding it. If left empty, PolyFX assigns an automatic name such as PFX_Layer_1.
Add objects to layer
Saves the object currently active in the PolyFX window as a new layer entry, along with all current parameters and curve settings.
Set Layer
Makes the selected layer active, restoring its stored object, parameters, and curves into the main PolyFX window. Hover over the button to see which layer is currently active, shown as a tooltip.
RW. Layer (Rewrite Layer)
Overwrites the selected layer with the current state of the PolyFX window. Always press this after changing parameters for the active layer — otherwise, switching to a different layer will discard your changes.
Delete
Removes the selected layer from the list. Fragment objects in the scene are not affected.
Collapse Controllers

This tool converts procedural animation — from Controller or Particle mode — into standard keyframe animation. After baking, fragments no longer depend on Script Controllers or Particle Flow, making the scene fully portable and compatible with any renderer or render farm.
Open this window from the menu bar: Animation > Collapse Controllers.
Start Frame / End Frame
The frame range to bake. Keys are recorded at each frame step within this range, so make sure it covers the full extent of your animation.
Step
Keyframe density. A value of 1 records a key at every frame. A value of 2 records every other frame, and so on. Higher steps produce fewer keys, but interpolation between them may not perfectly match the original motion.
Collapse Controller
Starts the baking process. In Controller mode, the Script Controller value on each fragment is sampled frame by frame and written as a standard transform key. In Particle mode, particle transforms are read from the PFlow system and applied to copies of the original fragment objects, after which the PFlow source is cleared.
Fragmentation Tools
PolyFX includes two standalone fragmentation tools for preparing a mesh before animating it. Access them from the
Slice Fragmentation


Cuts a mesh with one or more parallel planes, producing clean, straight-edged fragments. Best suited for hard-surface objects.
Pick
Select the mesh to slice. Only geometry that can be converted to Editable Poly is accepted.
Show In Viewport
Displays the slice plane positions as viewport overlays so you can preview the cut location before executing it.
Num. Slices
The number of parallel planes to cut through the mesh. A single slice cuts the object in two; more slices produce more pieces.
Spacing
Distance between each slice plane in scene units. Only relevant when Num. Slices is greater than 1.
Offset X / Y / Z
Moves the center of the slice group along each axis relative to the object's own coordinate system.
Rotate X / Y / Z
Rotates the slice planes around each axis. Use this to cut at an angle instead of straight through.
Scale
Scales the visual display of the plane gizmos in the viewport. Does not affect the actual cut area.
Split
When enabled, the slice creates a physical gap between the two resulting pieces. When disabled, the operation adds edge loops without separating the mesh.
Cap Holes
Fills the open edges created by the slice so each resulting piece is a closed solid. Only available when Split is enabled.
Assign Material ID
Assigns a specific material ID to the newly created cap faces. Useful for applying a different material to the interior cut surfaces. The spinner to the right sets the ID number.
Slice
Executes the cut. The operation is undoable.
Pattern Fragmentation


Breaks a mesh into irregular fragments using polygon-selection patterns. Unlike Slice Fragmentation, the results are organic and non-uniform in shape.
Pick Object
Select the mesh to fragment.
Type
The pattern algorithm used to group polygons into fragments.
- Lines: Selects edge rings and converts them to face selections, producing strip-shaped fragments that follow the mesh topology.
- Rectangle: Grows face selections outward from a random starting face, creating roughly square or blob-shaped clusters.
- Plus: Similar to Lines but uses a cross-shaped selection expansion from a random face.
- Brick: Selects sequential ranges of faces, producing uniform brick-like strips.
- "Z": Uses loop-based selection, creating zig-zag shaped fragments along the mesh.
- Border: Works from open border edges inward, designed for meshes with holes or open boundaries.
Length
The base size or extent of each fragment. The meaning varies by type — for Lines it is the ring count, for Rectangle it is the number of growth iterations.
Random
Adds a random variation to the Length value. A value of 0 produces fragments of uniform size; higher values introduce irregular sizes.
as Objects
When enabled, each fragment is detached as a separate scene object instead of remaining as an element within the original mesh. Required when you plan to use the result in PolyFX with the Elements option.
Reset Pivot
Centers the pivot of each detached object to its local bounding box center. Only available when as Objects is enabled.
Clear Smooth. Grp.
Removes all smoothing groups from the result. Gives fragments a flat, faceted look.
Preview Mode
Runs the fragmentation non-destructively on a copy of the object, coloring each fragment randomly so you can evaluate the result without modifying the original. The source object is preserved and restored when Preview Mode is turned off.
Fragmentation
Executes the fragmentation. In Preview Mode, runs a preview on a temporary copy. In normal mode, modifies the original mesh directly.
Quick Detach

A simple utility that detaches every polygon or element of a mesh into separate scene objects in one click. Faster and more straightforward than doing it manually in the modifier stack.
Pick
Select the source mesh. Only geometry that can be converted to Editable Poly is accepted.
Sub-Object Level
Determines what becomes a separate object.
- Polygon: Eeach individual face becomes its own object, which is useful when you want the maximum number of fragments.
- Element: Each disconnected mesh element becomes its own object, which is useful when the mesh already contains pre-modeled or logically grouped pieces.
Center Pivot
When enabled, each detached object's pivot is moved to its local bounding box center after detaching. Recommended — PolyFX produces better results when pivots are centered.
Detach
Executes the detach. The source object is deleted once all pieces have been separated. The operation is undoable.
Options

Global preferences for the PolyFX session. Open from Options > Options in the menu bar.
Color Button
Valid Node
The border color displayed on the Pick Object and Pick Gizmo buttons when a valid object is assigned. Default: blue.
Invalid Node
The border color displayed when the picked node is invalid or no longer exists in the scene. Default: red.
Disabled
The border color of pick buttons that are inactive in the current mode. Default: dark red.
Garbage Container
Clear Garbage Container
Manually runs the MAXScript garbage collector to free unused memory. Useful after working with a large number of fragments.
Auto clear Garbage Container
When enabled, the garbage collector runs automatically after each Create Animation or Set Control operation.
Other
Reset all parameters after restart PolyFX
When enabled, all UI parameters and curve settings are reset to their defaults every time the PolyFX window is closed and reopened. Useful for starting a fresh session without leftover values from a previous project.
PolyFX Modifier
PolyFX also includes a modifier-based workflow as an alternative to the main dialog. The modifier is applied directly to an object in the modifier stack and provides interactive, non-destructive animation control.
Main

Activate
Enables the modifier. When off, the mesh is passed through unchanged.
Update Mesh
Forces a manual cache rebuild and viewport refresh. Use this if the mesh does not update automatically after changing source geometry.
Separate By
Defines how the mesh is split into individual pieces before transformation is applied.
- Polygon: Each polygon becomes a separate piece.
- Element: Each disconnected element becomes a separate piece.
Vertex Weld
When enabled, merges vertices that fall within the threshold distance after all transformations are applied. Useful for closing seams between adjacent pieces at rest pose.
Threshold
Maximum distance between vertices to be welded. Only active when Vertex Weld is enabled.
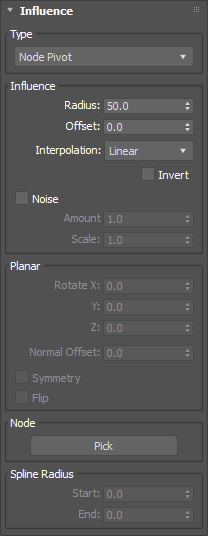
Influence
Controls which pieces are affected and how strongly. All Move / Rotate / Scale values are multiplied by the influence factor (0–1) computed for each piece.
Type
Determines how the influence distance is measured for each piece.
- Planar: Distance is measured along the normal of a virtual plane. Use the Planar group below to orient it.
- Node Pivot: Distance is measured from the pivot of a picked node.
- Nearest Spline Point: Distance is measured from the nearest point on a picked spline, with optional per-point radius taper.
Influence Group
Radius
The falloff range. Pieces within this distance from the influence origin receive full effect; pieces beyond it receive none.
Offset
Shifts the influence boundary inward or outward along the measured axis without changing the radius size.
Interpolation
Curve shape of the falloff between 0 and full influence.
- Linear: Even, straight ramp.
- Smooth: Ease-in/ease-out (cosine curve).
- Exponential: Slow start, fast finish.
Invert
Flips the influence so pieces outside the radius are fully affected and pieces inside are unaffected.
Noise
Adds 3D Perlin noise to the distance value before the influence is computed, breaking up the uniform falloff edge.
Amount
Strength of the noise displacement in scene units.
Scale
Spatial frequency of the noise. Larger values produce broader, smoother variation; smaller values produce tighter detail.
Planar Group
Rotate X / Y / Z
Rotates the influence plane around each axis. Only available when Type is set to Planar.
Normal Offset
Moves the plane along its own normal, effectively sliding the influence boundary through the object.
Symmetry
Makes the influence treat both sides of the plane identically, mirroring the effect.
Flip
Reverses which side of the plane is considered "inside." Disabled when Symmetry is on.
Node Group
Pick
Select the scene node used as the influence origin. Required for Node Pivot and Nearest Spline Point types.
Spline Radius Group
Start / End
Per-point radius along the spline. The radius tapers linearly from Start at the first knot to End at the last knot, offsetting the distance measurement at each point. Only active when Type is Nearest Spline Point.
Move
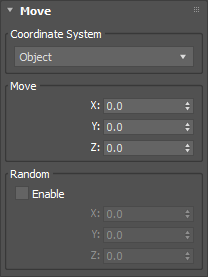
Coordinate System
- Local: Translation is applied in each piece's own local space (relative to its face normal-derived orientation).
- Object: Translation is applied in the parent object's world space.
Move X / Y / Z
Amount to translate each piece along each axis, scaled by its influence value.
Random
Activates per-piece random offset added on top of the base Move values.
Random X / Y / Z
Maximum random displacement range per axis. Each piece gets a random value between negative and positive of this amount, then multiplied by influence.
Rotate

Coordinate System
- Local: Rotation is applied around each piece's own local axes.
- Object: Rotation is applied around the object's world axes, pivoting in place.
Rotate X / Y / Z
Rotation angle in degrees per axis, scaled by influence.
Random
Activates per-piece random rotation added on top of the base Rotate values.
Random X / Y / Z
Maximum random rotation range per axis in degrees. Each piece gets a random value within ±this amount, then multiplied by influence.
Scale
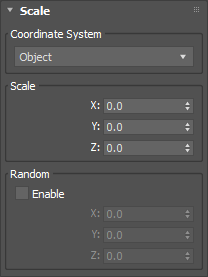
Coordinate System
- Local: Scale is applied along each piece's own local axes.
- Object: Scale is applied along the object's world axes.
Scale X / Y / Z
Target scale multiplier per axis. A value of 1.0 means no change; 0.0 collapses the piece to nothing. The result is blended with 1.0 by the influence factor, so unaffected pieces stay at their original size.
Random
Activates per-piece random scale subtracted from the base Scale values.
Random X / Y / Z
Maximum random scale reduction per axis. Each piece loses a random amount up to this value, multiplied by influence.
Bake Animation

Bakes the animated modifier result into separate real mesh objects with keyframed transforms, one object per piece.
Bake
Starts the bake process. For each frame in the defined range, the modifier evaluates all piece transforms and writes a transform key to each output object. Press Esc to cancel mid-bake.
Delete
Removes all previously baked objects from the scene. Available only after a successful bake.
Time Range
- Active Time Segment: Uses the current timeline start and end frames.
- Custom: Allows entering Start and End frame values manually.
Every Nth Frame
Bake interval. 1 creates a key on every frame; 2 every other frame, and so on.
Output Group
Select
Automatically selects all baked objects in the scene after the bake completes.
Add To Named Sel. Set
Adds all baked objects to a named selection set so they can be recalled later.
Name
The name of the selection set. Only active when Add To Named Sel. Set is enabled.
Save & Load Settings
PolyFX can save and restore all UI parameters and curve shapes to a .ini file. This lets you build a library of presets and reuse them across projects without reconfiguring the interface each time.
Both options are available under Mode > Save Settings and Mode > Load Settings in the menu bar.
Save Settings opens a file save dialog. All current values — spinners, checkboxes, dropdowns, color pickers, and curve point positions — are written to the selected .ini file along with the active mode.
Load Settings opens a file open dialog. The saved values are restored into the UI and the stored mode is reactivated. Curves are rebuilt point by point from the saved data.
Tips & Best Practices
Preparing the mesh
PolyFX detaches polygons or elements one by one during Create Animation. A mesh with a very high polygon count will generate a large number of fragment objects, which slows 3ds Max significantly. For best performance, use Slice Fragmentation or Pattern Fragmentation to break the mesh into a manageable number of elements first, then use the Elements option in PolyFX.
Speeding up Key mode iteration
With many fragments, key generation takes longer as Curve Step increases. While prototyping, set Curve Step to a low value (large divisor) to generate fewer keys per fragment. Once you are satisfied with the look, increase the step for a smoother final result.
Assembly vs. disassembly
The default behavior (Invert off) animates fragments from scattered back into the assembled object. Enable Invert to reverse this — the object starts assembled and fragments fly apart. Both Invert and Reverse can be toggled after generation without re-running Create Animation.
Controller and Particle mode performance
Both modes re-evaluate transforms on every viewport update. If the viewport feels sluggish, disable unnecessary Auto-Update options in Controller mode, or reduce Quantity % in Particle mode to work with a subset of fragments. When finished, bake to standard keys using Collapse Controllers.
Texture map workflow
Transform by Map requires the source mesh to have a UV mapping before fragmentation. If fragments were detached without UVs, add a UVW Map modifier and collapse the stack first. A resolution of 100–200 is usually sufficient and keeps the Particle mode viewport responsive.
Using Layers for complex scenes
When a scene contains multiple objects that each need their own PolyFX animation, use Layers instead of running PolyFX multiple times independently. Add each object as a separate layer, configure its parameters, and press RW. Layer to save them. Switch between layers to update each object's animation independently while keeping all settings intact.