Overview
FoldMeshFX is a 3ds Max plugin that animates objects unfolding from selected polygons. It provides full control over timing, direction, sequence, and geometry adjustments, while adding natural swinging effects for realism. Additional options for naming, grouping, and material assignment make it versatile for motion graphics, visualization, and production-ready workflows.
Requirements & Installation
Requirements
3ds Max 2010 - 2027
Installation
- Unzip the archive
FoldMeshFX.zip. - Copy the
FoldMeshFXfolder to3ds Max 20xx\scripts. - Drag
FoldMeshFX_Macro.mcrinto the viewport to install the macro. - Open
Customize > Customize User Interfaceand locate it underGroup: Main UI > Category: BodyulCG. - Optionally assign the macro to a hotkey or drag it onto a toolbar for quick access.
Quick Start
This section walks you through the minimal steps to get a result. All parameters are left at their defaults.
- Launch the script using the toolbar button or the assigned hotkey.
- In the Source Object rollout, click Pick Object and select your mesh. It must be an Editable Poly — if it isn't, the script will offer to convert it automatically.
- Enter Polygon sub-object mode on your mesh and select one or more faces as the starting point of the unfold.
- In the Create Animation rollout, click [GO]. A progress bar will indicate generation progress.
- Once complete, Delete and Select Result buttons become available. Use Select Result to select all generated objects, or Delete to discard the result and try again with different settings.
The source object will be hidden automatically (if Hide Source Object is enabled in Other Settings). Scrub the timeline to preview the animation.
Interface Overview
The FoldMeshFX panel is divided into five collapsible rollouts. They can be expanded or collapsed by clicking their headers.
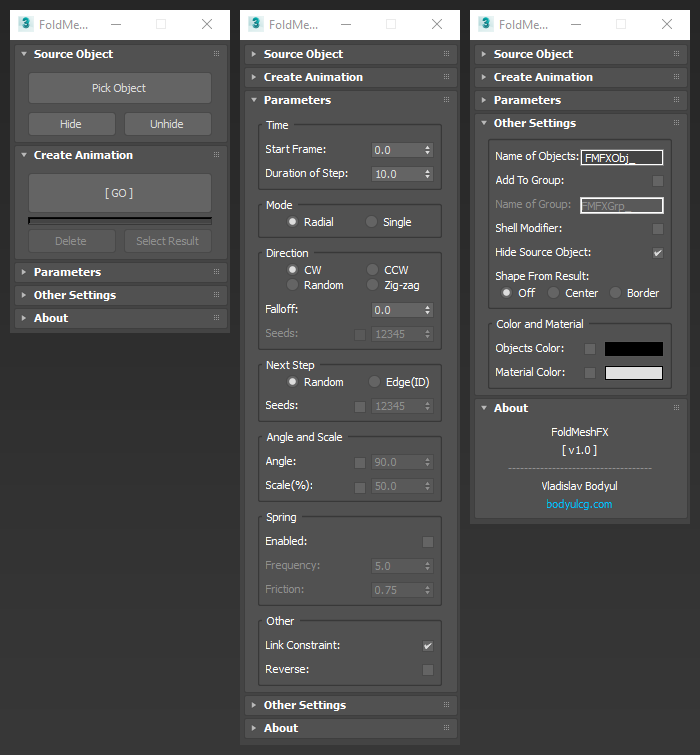
Source Object
Defines the input mesh used for the animation. You must pick a valid object here before generation.
Create Animation
Handles generation of the animation and basic result management, such as deleting or selecting the generated objects.
Parameters
Contains all settings that control how the animation is generated.
Other Settings
Contains output options: object naming, grouping, Shell modifier, source visibility, shape generation, and color/material assignment.
About
Displays the current version number and a link to bodyulcg.com.
Source Object
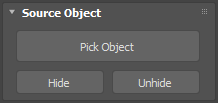
This rollout is your starting point. Before generating the animation, you need to assign a source mesh.
Pick Object
Click this button, then click on any object in the viewport to assign it as the source. The object must be an Editable Poly — if it isn't, a dialog will ask whether to convert it automatically. Once picked, the button label changes to the object's name.
Hide / Unhide
Hides or unhides the source object in the viewport. Useful when the source overlaps the generated result and you want a cleaner view during preview.
Create Animation

This rollout controls generation and manages the result.
[GO]
Starts the animation generation process. Requires a valid source object with at least one polygon selected. A red progress bar below the button shows generation progress. Press Esc to cancel mid-process.
Delete
Deletes all generated objects from the current result. Becomes available after a successful generation.
Select Result
Selects all generated objects in the scene. Useful for moving, grouping, or further editing the result manually. Becomes available after a successful generation.
Parameters
All parameters in this rollout are read at the moment you press [GO]. Changing them after generation has no effect on the existing result — use Delete and regenerate.
Time
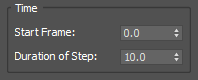
Start Frame
The frame on which the animation begins. Increase this value if you need the animation to start later in the timeline, for example when combining with other animated elements.
Duration of Step
The number of frames each polygon takes to complete its fold. Lower values produce a faster, snappier unfold. Higher values produce a slower, more gradual one. This value also controls the spacing between consecutive steps — the overall animation length scales proportionally.
Mode
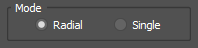
- Radial: The unfold spreads outward from the selected polygon(s) in all directions simultaneously, like a wave. Every neighbouring polygon at the same distance from the origin unfolds at the same step. This is the default mode and produces the most natural spreading effect.
- Single: The unfold follows a single chain of polygons rather than branching outward. At each step, only one neighbour is chosen as the next in sequence. This produces a snake-like or path-like unfolding effect.
Direction
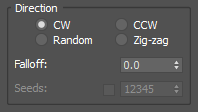
Controls the rotation direction of each polygon as it unfolds.
- CW: All polygons fold clockwise relative to their shared edge.
- CCW: All polygons fold counter-clockwise relative to their shared edge.
- Random: Each polygon independently picks a random fold direction. Enabling the Seeds checkbox and setting a seed value makes this result reproducible across multiple generations.
- Zig-zag: Polygons alternate between CW and CCW with each successive step, creating a mirrored back-and-forth folding pattern.
Falloff
Controls how much successive steps overlap in time. At 0 (default) each step starts only after the previous one has fully completed its fold. Increasing the value causes steps to begin earlier, before the previous step finishes — creating a smoother, more fluid wave. Range is 0 to 1.
Seeds
Available only when Direction is set to Random. Enable the checkbox to fix the random seed to a specific value, making the random direction pattern reproducible. With the checkbox off, the seed is based on system time and the result will differ each generation.
Next Step
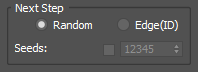
Controls how the next polygon in the unfolding sequence is chosen at each step.
- Random: At each step, the next neighbouring polygon is chosen randomly from all available candidates. This is the default and produces organic, non-uniform spreading.
- Edge(ID): The next polygon is always chosen based on edge index order rather than randomly. This produces a more predictable, structured unfolding sequence.
Seeds
Available only when Next Step is set to Random. Enable the checkbox to fix the random seed, making the sequence reproducible across multiple generations.
Angle and Scale
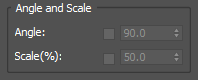
Angle
By default, the fold angle for each polygon is calculated automatically from the actual geometry — specifically the dihedral angle between the polygon and its neighbour. Enable the checkbox to override this with a fixed angle value. Default override value is 90°. This is useful on flat meshes where the automatic angle would be 180° and polygons would fold completely flat.
Scale (%)
Enable the checkbox to make each polygon start its animation at a reduced scale, growing to full size during the fold. This creates a "pop in" birth effect. The value sets the initial scale percentage.
Spring
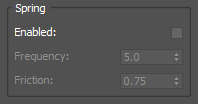
Adds an overshoot oscillation at the end of each polygon's fold, simulating the inertia of a physical panel snapping into place.
Enabled
Enables or disables the spring effect.
Frequency
Controls how fast the oscillation cycles. Higher values produce a quicker, tighter bounce.
Friction
Controls how quickly the oscillation decays. A value of 1.0 means no oscillation at all — the polygon stops immediately. Lower values allow more swings before settling.
Other
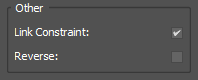
Link Constraint
When enabled, each generated polygon object is parented to its predecessor in the unfolding chain. This means child polygons inherit the position of their parent, keeping the hierarchy structurally connected as the animation plays. Enabled by default. Disabling this will cause the objects to animate independently in world space, which produces a different visual effect — not an error, but generally not the intended result.
Reverse
When enabled, the generated animation is reversed in time after generation. The unfold becomes a fold — polygons collapse back toward the origin instead of spreading outward. The timing and all other parameters apply in the same way, just mirrored in time.
Other Settings
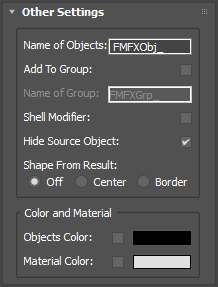
These options control naming, grouping, post-processing, and appearance of the generated objects. Like Parameters, they are read at the moment you press [GO].
Naming
Name of Objects
The base name used for all generated polygon objects. A unique numeric suffix is appended automatically to each object.
Grouping
Add To Group
When enabled, all generated objects are collected into a single 3ds Max group after generation.
Name of Group
The name assigned to the group. Only available when Add To Group is enabled.
Shell Modifier
When enabled, a Shell modifier is applied to all generated polygon objects after generation, giving them physical thickness. Useful when the source mesh consists of single-sided polygons that would otherwise appear invisible from one side.
Hide Source Object
When enabled, the source object is hidden automatically when you press [GO]. The source can be revealed at any time using the Unhide button in the Source Object rollout.
Shape From Result
Generates additional spline objects alongside the animation, tracing the boundaries and connections between polygons as they unfold. Intended as a visual aid to inspect the unfolding order and see where polygon boundaries fall — not intended for production use.
- Off: No splines are generated.
- Center: Generates a spline connecting the center points of adjacent polygons in the unfolding sequence, tracing the path of the wave.
- Border: Generates splines along the outer border edges of each polygon as it unfolds, outlining the expanding boundary of the result.
Color and Material
Objects Color
When the checkbox is enabled, all generated objects are assigned the selected wireframe color. When disabled, the wireframe color of the source object is used instead.
Material Color
When the checkbox is enabled, a new Standard material with the selected diffuse color is created and applied to all generated objects. When disabled, the material of the source object is inherited instead.
How It Works
Understanding the underlying process can help explain why certain parameters behave the way they do.
When you press [GO], the script performs the following steps:
- Creates a temporary working copy of the source object with its transforms reset, leaving the original untouched.
- Iterates through all polygons of the mesh starting from the selected face(s). At each step, it detaches the current polygon as a separate object, places the pivot on the shared edge between it and its predecessor, and calculates the fold angle — either from the actual dihedral angle between the two faces or from a custom value if overridden.
- Writes rotation and scale keyframes for each object according to the timing parameters. The Radial mode processes all neighbours at the same distance simultaneously, while Single mode follows one path at a time. The Falloff value compresses the timing so that consecutive steps can overlap.
- If Spring is enabled, adds additional rotation keyframes after the main fold keyframe, simulating oscillation by iterating the angle through a damping loop until it falls below a threshold.
- If Link Constraint is enabled, parents each object to its predecessor at the end of the animation range, preserving the chain hierarchy.
- Applies optional post-processing steps in order: Shell modifier, grouping, Reverse, wireframe color, and material.
Known issues & workarounds
Issue: Error "The transformation matrix for object contains a zero scale in (x/y/z)" while rendering in Mental Ray or IRay.
Workaround: Bake the animation into the animated vertices using the Bake Animation tool, then you can render it without errors.